Ideas for editing your travel pictures

Spread the love

A permanent problem of digital photography is what happens after you take a photo. Post-processing, where you edit the images, creates the final product. It is where you create the final image. Editing a photo is the equivalent of a darkroom from the old days when we took the pictures in the film. Here are a few ideas for editing and obtain perfect images.

We will share some ideas for editing your images, from the basics (leveling) though to more complicated actions, such as highlight information or recovering shadow.

How to crop the pictures

You can change the size of your photo and change the aspect ratio. It is possible to change the shape of an image, from rectangular to square, for example. When you need to publish an image in a different format or aspect ratio, you need to crop it.
I’ll crop the image to remove the useless space and focus on the ladybug.

Cropping is very simple. You need to select the crop tool and then select the area you need to keep with your mouse or finger. Apply and save the changes, and your picture will be perfect.

How level your travel photos

When the horizon line in a picture is not level, I have a problem. Here is an idea for editing to fix the level.

It happened when I forgot the basic rule, but the good news is that I can edit the photo to make it level. A line overlaid near the horizon shows if the picture is level. If you use Lightroom, the level tool is part of the crop tool. You need to rotate the image to suit. A good idea for editing is to use the level tool, a grid will appear to help you get the perfect alignment. In Snapseed, the level tool is Rotate. The task is simple, it takes only a few seconds, and the photo is visually pleasing.

Vignetting your images

The procedure makes parts of the photo darker or lighter than other parts.

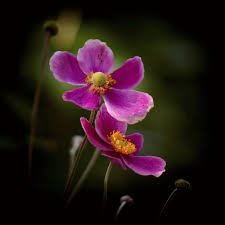
Vignetting shows clearly the subject of the shot.
Some photo editors restrict the vignette to the corners, but Lightroom and Snapseed allow you to darken and lighten.

Vignetting is suitable for portraits

vignetting

Change shadows and highlights in your images

When you take a photo, parts of the shot might end being brighter or darker than necessary. We call the shaded area as shadows and the illuminated area as highlights. Fortunately, there are tools, such as a “shadow” and a “highlight” tool. The tool works fine with RAW files than JPG, which discards part of the information to save file size.

How to adjust the contrast and colors

When you need to accentuate the difference between the dark and light parts of an image, you need to change the contrast. Increasing the distinction improves the image’s visual impact. Color adjustment is also essential.
contrast

Adjusting the image color enhances the photo quality from the warmth of the picture (how blue or yellow appears). It is possible to change the hue and saturation of some colors. The faster way to adjust the image’s color is the “saturation.” A tool changes the appearance of every color to make it less and more saturated. It is possible to de-saturate an image. This procedure can have resulted in a black-and-white picture.

As with any other edits, the key is to establish a balance. Over-saturated photos tend to look unnatural. De-saturated images are useful. Black and white is an excellent choice. The general advice is not too over saturated and not too under-saturated.  To adjust saturation, use the adjustment panel in Lightroom and “tune image” in Snapseed.

Blemish correction

Image healing or blemish correction is suitable when in an image therein, something that you don’t want to be there. It is easy to remove an unexpected object in almost all editing tools. You can find other ideas for editing in the popular editing app. The blemish tool works better on small objects surrounded by uniform colors. A healing toll must replace the area you need to remove with something else, and it works better when it has something similar in the area nearby. The healing tool is appropriate for any fixes, such as removing the unwanted background, removing skin blemished, or power lines in landscape photos. 

Best photo editing software

Here are a few of the best editing tools.

Adobe Lightroom (PC or Mac)

It is the standard tool among Apple users. It is not the best of the best because it is hard to use.

Picassa (PC or MAC) –

It is a free desktop photo editor from Google. Picassa does everything we talked about in this post. Lightroom is overwhelming, but Picassa is a great place to edit photos.

Snapseed (iOS and Android)

Another free Google app, Snapseed is the best mobile photo editor for Android and iOS. It is a powerful tool with great features.
How to polish to perfectly finishes photos

The number one in your editing work is never to edit the original. It is an useful idea for editing. Please make a copy and the same copy as a layered file. You can edit and adjust layers individually. The best-layered format is PSD. All photo editing app has the option to save as or export as PSD. Other forms are not suitable for editing images.

Resize photos without losing the quality

Making an image smaller is not a problem. Resizing up ruins the picture. To avoid pixelation, without adjusting the pixels to compensate. There is a difference between a simple resize and the resizing method called “resampling.” Photoshop provides resampling options such as Bilinear, Bicubic, or Bearest neighbor. You need to experiment with each process to obtain the best results.

How to remove backgrounds

Removing the background is always a challenge. The polygonal lasso tool helps to select the object in the foreground and invert the picture, then delete the active layer. There is another method: cut and paste the image onto a new layer and choose a special effect to fill the background, such as motion blur, a Gaussian blur, or a filter.

One more method: use the pen tool to outline the object and create a clipping path. When the object in outlines, tap and hold the Ctrl key, and click the Vector Mask on the Layers palette. Move the cursor to the background payer and delete it.

Leave a Reply

Your email address will not be published.