If you want to be a photographer, you need to buy first a professional camera. Maybe you want only to learn how to edit photos to create an album? Using the next tips, you will create high-quality images, taking your experience to the next level. When you need to edit some photos, you would like to use Photoshop, Lightroom, or Adobe Camera Raw. These are the professional photographers’ favorite photo editors. Here are some useful tips on the most popular photo editing programs. Your shots will become incredible.
Speeding simple processes
The workflow is the main issue when editing photos. Sometimes, it takes a few hours to edit two or three photos. You will spend time to open, edit, and save the images. Adobe Camera Raw and Lightroom provide a series of shortcuts. Lightroom helps to save time using Ctrl+Shift+V (for Paste) or Ctrl+Shift+C (for Copy) commands.
Camera Raw Filters
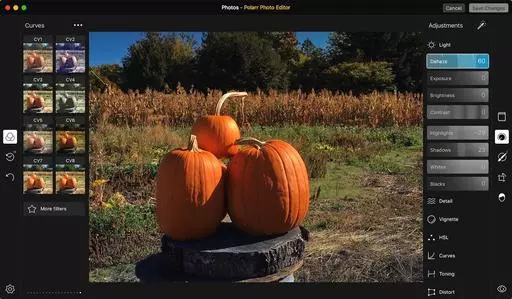
Photoshop offers the option to enable a Camera Raw interface. A fast layer editing is available in Photoshop. You only need to select the layer, then Filter and Camera Raw Filter. If you need to fine-tune your photos, you need to convert the layer into a Smart Object. You can di that using Filter, then Convert for Smart Filters. This operation can prevent destructive edits.
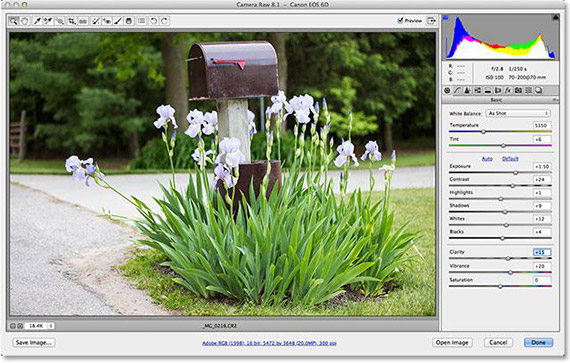
Find more about camera and lens adjustments
First, you need to find more about Lightroom and ACR. Before making essential changes to contrast and color, check the panel Camera Calibration. The option Lens Corrections tab and Enable Lens Profile Correction are effective. If you use lenses type wide-angle, the automatic lens adjustment can push a few areas of your photo out of the frame. You need to check these options before cropping the photo.
Use the shortcuts
You will save time and have an excellent command of the application. You can simplify the zooming by pressing and holding the key H. In Photoshop; this will produce an instant zoom. To check the image details in all areas, you need to hold the space bar to switch to the Hand Tool. It is a way to drag the image and move it around.
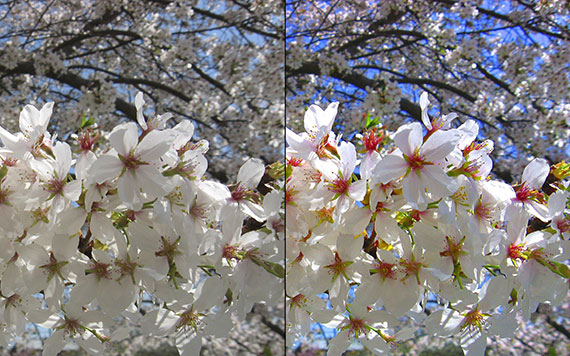
Create vivid skies
In Lightroom or Adobe Camera Raw, you can boost a little in contrast. You are talking about the cloudy and the blue sky. You need to select Luminance. Then you need to drag the blue slider to the left. Now darken the sky. The edges of the clouds might intrude to the sky. Do not overuse this method.
There are other techniques to do the same effect, such as the Graduated Filter. It helps to Curves or Clarity. You also can increate saturation or Vibrance. There also is the Targeted Adjustment Tool to use directly on the photo. Select the option from the ACR tools bar. The same effect happens by clicking on the bullseye icon on the top of the panel in Lightroom. Now you can click, then drag on dark zones.
Experiment with preset settings
You can find the Preset Panel on the left of the interface after clicking on Develop Module. You will find the color presets good for experimenting. If you need to undo an effect, scroll down to the History palette. Click back through the history states. Go to Lightroom Effects Presets and then select Light Grain.
Use Apply Levels selectively
There is a feature in Adjustment Layers named Layer Mask. This procedure helps when hiding parts of the tweak. You can select the Brush tool and paint over tweaked parts to reveal the tweak; you need with black. The command Cmd/CTRL+I to make the Layer Mask black. You need to paint with white to reveal the tweak. Now apply the Level as Adjustment Layers. It is possible to mask to eliminate the effect of some areas of the photo.
Stylizing photos
You may find these steps useful to apply a stylish look to your photos. The first step is to upload your photo in Photoshop. Then select the panel Brightness / Contrast. Adjust Brightness to +25. The contrast must be +35 and saturation -25. Adjust the Curves layer. Now you can choose Red. Drag down the center of the red line. Move the blue line forward. Select and move up the green bar. To finish, select the Soft Light blending mode. To finish the procedure, we need to add two Solid Color adjustment layers. Choose the yellow color (the pale one) and set the blending mode to Overlay. Set it to 35%. Type “f000ff” for the second color layer. Now select Screen for the blending mode and Opacity to 30%.
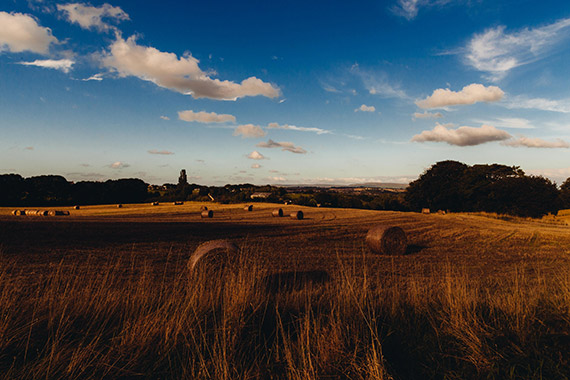
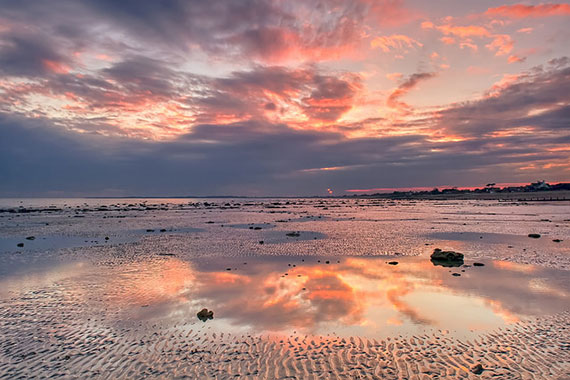
How to get great colors
You can make a stunning effect to make the sunset alive. Yellows and purples in the sky are the effects of setting sun. To capture the richness of the beautiful colors, you present a few tricks You need to avoid having a dark sky and lose the beautiful sky colors. The meter of your camera will see the sunlight. You need to let everything else go dark. The solution to fix it, you need to meter for the sky, letting the sun out of the frame. Later, you can recompose the photo, including it. This procedure increases the exposure value. You will expose the sun more appropriately. It is the way to get the beautiful colors to “pop.” The colors will be deepened and intense, using a slight underexposure.
Overexposing the sky washes the beautiful colors we are searching for. On the contrary, if you underexpose too much, everything goes black. This is the reason why digital shooting images are often better than videos. We have complete control on the fly. When you shoot a film, you need to guess the exposure. Sometimes, we are wrong. The procedures take a few days to process a film. Occasionally, we need to pay to see lousy sunset photos.
The use of a digital camera allows the possibility to see the results immediately. You tweak the settings until you get what you want. Usually, a side of underexposing the sky is to make the ground area to go to dark.