
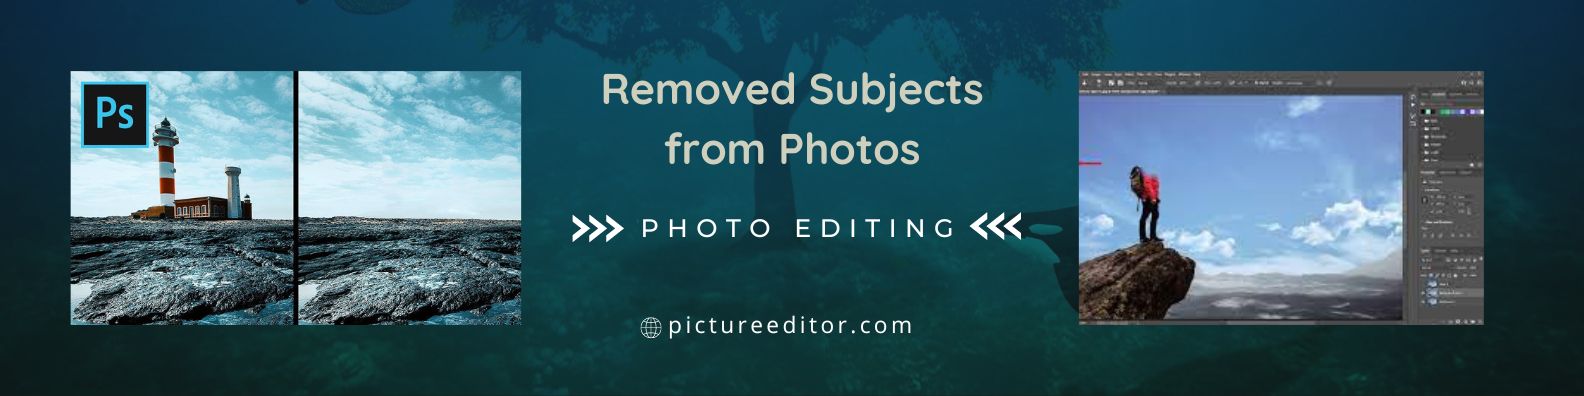
Removed Subjects from Photos: Removing a subject or object from your image can assist decorate the scene.. Perhaps you need to dispose of someone from the image, dispose of gadgets or simply need to ease up the picture, eliminating dirt spots, garbage, or little marks
When modifying your images, no matter whether or not. If you’re photographing portraits, travel, landscapes, or every other genre. You can stumble upon the want to dispose of undesirable elements.
The purpose of making a lovely image is to dispose of distractions. That may deter the viewer from seeing the problem and rather be drawn toward something like a bit of garbage on the ground. You need all eyes to be centered on the tale. You’re trying to inform the scene you want to exhibit with no different little functions getting withinside the way.
Removing a topic from your pictograph may be a small activity consisting of eliminating an unmarried dirt spot, or an extra time-eating manner like eliminating footprints withinside the sand from a crowded beach.
What are a few motives you may need to dispose of gadgets out of your picture?
- They’re distracting your meant focus
- Dust spots or marks out of your sensor are seen withinside the photo. (by no means ship your patron an image with dirt spots and constantly appearance over each mm to make sure there aren’t any seen!)
- A department is probably protecting a part of the scene and its presence isn’t required to exhibit the general splendor of the landscape.
- There can be little portions of garbage or ugly patches of dust or stains. That may effortlessly be eliminated with a gap recovery brush.
- You may also want to dispose of scars or acne if a patron requests this.
Adobe Lightroom:
In Lightroom, you could use the Spot Removal device which goes to copy the place. Surrounding the spot you’re eager to remove. You’ll discover it withinside the ‘Develop’ mode, 2d throughout withinside the row of gears, or can open through urgent. The keyboards shortcut ‘Q’
Heal Matches the texture, lighting, and shading of the sampled place to the chosen place.
Clone Duplicates the sampled place of the picture to the chosen place
Once you’ve decided on the place you desire to repair. Drag it throughout the picture and you’ll see it changed through associated content. I’ve in my view discovered it’s now no longer as steady because of the Spot Healing Brush in Photoshop. However, if you’re used to enhancing with Lightroom you’ll in all likelihood don’t have any troubles.
Adobe Photoshop:
In Photoshop there’s the Spot Healing Brush which goes just like the Lightroom device but I discover it a bit greater unique while the use of the ‘Content-Aware’ mode.
Simply use the bracket keys to extend or limit the dimensions of the comb and area it over the item you desire to remove. I LOVE gambling with this to eliminate undesirable matters inside my panorama snapshots in particular. Tiny information like footprints in the sand, the extraordinary piece of seaweed that doesn’t make a contribution to a seashore scene, garbage bins…something that distracts from how I need the scene to appear.
You also can use the Clone device to select a place of your picture and stamp it over something you desire to remove. That is one method human beings favor to keep away from the guesswork of the Spot Healing Brush. Sometimes you could want to additionally use the Clone device. To restore any little troubles or joins constructed from the spot recovery brush.
There is likewise a choice to modify the dimensions of the form too, so if you’re running with small dirt spots, make sure the spot elimination device is pleasant and tight over the problem so you’re now no longer impacting every other factor of your photo.
Luminar:
you’ll find both the Erase, Clone, and stamp tools will help to remove unwanted objects using Luminar. If you haven’t yet tried this program, it’s one of the most talked about newbies and i think it’s well worth trialing to see if you fancy it. The Clone + Stamp tools work by selecting the object you wish to remove and replacing it with a similar pixel
so it blends into the image, similar to Content-Aware in Photoshop. With the Erase tool, it’s more like using a paintbrush in which you brush over the area you want to remove and let the magic of the program do the rest.
Just like the other two programs, you’re able to control the intensity and size of the replacement pixels when removing subjects from your photos with Luminar.
What to look for when removing the object from the photo?
- Do the lines within the image still all join naturally?
- Has the removal created any pixel patches that don’t look quite right?
The removal tools, while very nearly perfect, aren’t always 100% accurate. So it’s always essential to zoom and really look into your image to ensure all. The little elements still line ip naturally.