
What Is Product Photography
Do you think your boss is going to give you an award for producing the best product photography portfolio that he has ever seen? If your boss is asking for some high-class ideas to be used in internet marketing or for advertising your company, don’t break out into a sweat!
Being prepared for any kind of business presentation is always a plus. So if your boss is going to give you an award for a job well done, prepare for an even bigger one!
Your normal photography workshop would start with shooting your new product photography portfolio. This is the best chance for you to ask some questions or get some refinements. It is also a chance for you to see what camera/lenses you like best and for what purpose.
Make sure that you take pictures of the things that interest you the most. Don’t just take pictures of random things – it will make it much easier for you when it comes time to sell them!
How to Shoot For Product Photography
Shoot in a portrait mode or landscape mode
Try to shoot your product photography in either portrait mode (which usually gives you a better angle) or landscape mode.
The landscape mode is good if you like to capture nectarous plants, flowers, or other objects that you can then crop later.
Portrait mode works best for everyday objects. But whichever model you choose to shoot your photographs in. Always remember to have a reliable tripod to keep your camera stable and free from jitters.
You’ll be able to get the best shots if you are comfortable and relaxed while taking the photos.
Write a story for your photos
Another thing you should do before actually shooting your product photography is to write a story for your photos. It’s great if you have creative writing talent or can somehow pass off your thoughts on paper to your photographer.
This is something that you should do even before you actually sit down in front of the camera. Remember that you don’t need to be a writer to pass off an excellent product photo.
All you have to do is be able to relay your thoughts and ideas clearly and concisely. Your photographer can take note of these ideas and use them in the photo that will eventually be your selling point.
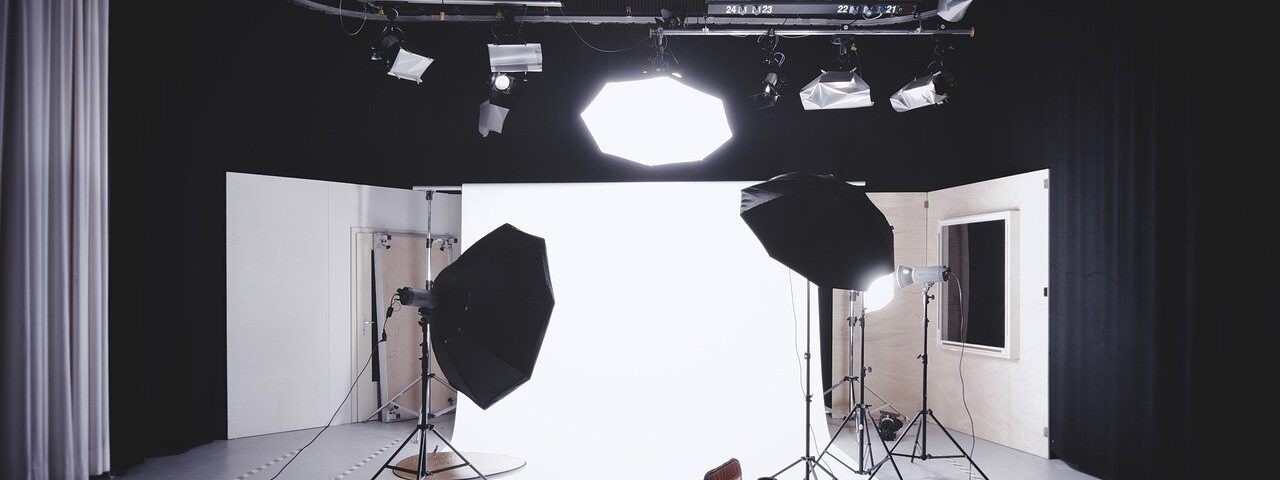
Pay Attention to Your Lighting Condition
Avoid shooting in poor lighting conditions. Lighting conditions can affect how a person sees an object. So it’s important to pay attention to the background when you’re preparing to shoot your product photography.
Think of the background as a character in the photograph – what kind of mood does it fit into? If the background is bright, that can often times distract from the object you are trying to capture. If the background is dark, it can also diminish the subject and its importance in the photo.
Avoid shooting in artificial light. Artificial light is great for many reasons – including the fact that it is easy to expose to various lighting conditions.
However, it can also cause problems for those attempting to create images with a digital camera, as there is less room for error with artificial light.
It’s important to pay attention to how artificial light is manipulated when you’re preparing to shoot your product photography.
Focus on group shots
Group shots are great for product photography because they give you the opportunity to get more of an effect with the same amount of time.
However, group shots also isolate the person in the shot – and that can be a problem if you want the viewer to focus on something specific. If possible, only take multiple, high-resolution (high DPI) shots of a person or object. And make sure you do so without moving the object.
Choose a model that looks the part
It’s a no-brainer – but many product photographers seem to make the huge mistake of choosing a generic model. Remember, the model must look like he or she will perform well for the camera, and the audience must believe the model is attractive. If you choose a non-favored body type or unflattering color. You’ll probably find your photos end up looking less polished than you’d hoped. Taking studio shots, on the other hand, can be a good way to improve your product photography skills.
Looking for Product Photography Tips?
If your boss has asked you, for example, to submit high-quality, professionally-produced product photos to be used in marketing or for online advertising, don’t panic! Instead, breathe deeply, think about your decision objectively, and determine how best to approach the situation.
After all, if you’re presenting high-end, life-size photos of your products, you must be able to show them off in the best light – both in color and black and white.
So, are there really product photography tips that work best?
There are definitely some useful product photography tips that can help you capture your subject matter in a way that makes an impression. Take note of your camera’s shooting modes: manual, auto, fun, and creative.
Try to experiment with each mode until you find the one that works best for you. When you’re in personal photography setting such as a wedding or engagement photoshoot. It’s best to go with the fun option. You can also use your smartphone camera to take product photos if that is what you were hired to do.
Change the backgrounds
Another product photography tip that you can apply in the editing process is to change the backgrounds when you change the time of the shot. If your subject appears in the foreground at sunset but is in the center of the frame during dawn, you should adjust the background’s lighting so that it appears as though the subject is in the middle of the frame.
Professional photographers understand this principle well, and they often do the photography-editing trick during shooting. But even amateur photographers should consider adjusting the background before the shoot. This will create a nice background effect, which will further increase the chances of getting that “look” the client is after.
Avoid Taking Underexposed Image
Now, let’s talk about exposure. You may have noticed that there are some product photos that just do not appear to be exposed correctly. In the photography world, this is an underexposed image. This means that the pixels on the image aren’t fully open. This is the worst thing you could do because your photos will never turn out properly.
Different types of lifestyle shots
Now, let’s talk about photography of the different types of lifestyle shots you might be interested in family shots, beach shots, nature shots, and sports shots. These types of photography require different settings.
Family shots should be taken outdoors with a soft background. Beach photos should be taken outdoors with a slightly warm color and an even temperature. Nature shots can be taken outdoors with a little bit of fog or mist covering the background if that’s what you’re dealing with.
Include using different types of light sources
Product photography tips for these types of images include using different types of light sources as well as adding some editing processes to increase your depth of field. With family photos, you’ll probably want to light the entire background with the same color as your subject but you can also use different colors for different areas.
For beach images, you can use blue or green filters to darken the ocean horizon. Adding some depth of field using filters is an easy and simple editing process that produces great-looking images.
When shooting sports photographs you will need to adjust your lighting so that the athletes or subjects are illuminated from all angles. This includes both the front and back of the subject.
With a good photography lighting setup, it will be very difficult for the athlete to be cut out of the frame. Also, the main light source in the frame will have to be recessed so that there is no reflection of light on the athlete. This will also add warmth and texture to the image.
In Conclusion
Finally, one of the most important Product Photography Tips is to remember that your camera has to be well-balanced. This means that the camera should be tilted upward at a comfortable angle, the flash should be aimed off to the right and left. And the lens should be set at a long focal length for the photograph.
These tips will make it much easier for anyone to get the best photos that they can possibly get with their cameras. Remember that even the slightest errors can ruin a good photograph. By using a tripod and setting up your camera properly you should have absolutely amazing results.